From lacerations to tendon sprains, here’s how to prevent and prepare for misfortunes far from home
You’re saddled up and ready to hit the trail on a beautiful spring day. Your horse is fit and ready to go. But we all know that when riding in the woods or out in the wilderness, things can go wrong—and usually when least expected. Therefore, it’s important to know the health and safety hazards you might encounter and be prepared to deal with an emergency. Here are some possible predicaments you might face.
Eye Injuries
When riding through the woods, your horse is at risk of getting smacked in the eye by a branch. If he’s squinting his eye or it’s tearing, he might have suffered a corneal abrasion. Or, if you’re riding out in a more open, arid region, windy conditions can stir up enough sand in the air to irritate the eyes and/or abrade the cornea. What can you do?
Heather Hoyns, DVM, of Evergreen Equine of Vermont, in West Windsor, recommends rinsing your horse’s eyes periodically with ophthalmic saline (available over the counter in the grocery store or pharmacy) as both a prevention and a treatment. Hoyns is an accomplished endurance rider and veterinarian with thousands of miles in the saddle over challenging trails throughout the United States. She also suggests adding to your first-aid kit a small tube of nonsteroidal ophthalmic ointment for lubricating injured eyes.
Hemorrhage
If your horse suffers a lower limb laceration, know that whatever sharp object caused it can sever an artery, causing hemorrhage. In this scenario place a clean pad or bandage on the site and apply finger or hand pressure over it, says Hoyns. “Many blood vessels follow grooves along the sides or back of the legs, so wad up a piece of fabric or use a roll of Vetrap placed in the grooves to apply pressure more directly on the injured artery,” she says. Because it takes at least 12 minutes for a small blood vessel to clot, resist the temptation to peek beneath the bandage to see how it looks.
Meg Sleeper, VMD, Dipl. ACVIM, is a clinical professor of cardiology at the University of Florida College of Veterinary Medicine, in Gainesville, as well as an accomplished FEI endurance competitor with thousands of conditioning and competitive miles on the trail. She experienced her own hemorrhagic scare while negotiating a 100-mile endurance course in mountainous Virginia terrain, when her horse lacerated a digital artery near his fetlock. From her position in the saddle, she didn’t realize for nearly a mile that her horse was gushing arterial blood. Another rider came upon them and alerted her to the injury. She then secured a tampon (which she keeps in her emergency kit for these scenarios) over the artery within a leg groove using bandaging material. This helped staunch the blood flow until the horse could be trailered to an equine hospital for emergency care.
Hoyns says horses can also spear themselves on branches—often up the inside of a leg. “If you have to pull (the branch) out, be aware of a possibility of hemorrhage,” she says. “Leave the horse in place and call for help.”
If a piece of wood gets embedded in soft tissue but isn’t lodged too deeply, you might be able to remove it gently using hemostats (surgical clamps), pliers, or an all-purpose tool from your emergency kit until you can reach veterinary care. Cover the wound with bandages to prevent further contamination.
But if a stick or post impales the horse’s inner thigh near the femoral artery, for instance, do not remove it without veterinary help due the risk of bleeding out, says Sleeper. When in doubt with penetration injuries, leave the object in place and await professional expertise.
Getting Stuck
Winter snow cover can make even the most familiar trails hazardous, obscuring obstacles or holes into which your horse could stumble. In addition, windblown snow can make uneven trails appear level, so your horse might unwittingly blunder into a deep snow bank up to his belly. A plunging horse is not only dangerous but also vulnerable to getting trapped.
If this happens and there is a way to dismount safely without getting stuck yourself, do so. Hoyns says it is important to avoid placing yourself in front of the horse because a panicky, thrashing animal puts you in immediate danger.
“To enable your horse to turn around to get out of the snow bank, dig toward him from solid ground, starting from the location you’d like your horse to end up,” she says. That way, the horse doesn’t move prematurely before you create a safe pathway out of the snow bank.
Mud and quicksand pose dangers that often require fire department or first responder intervention. The best rescue method is to use belly straps to pull the horse out, rather than pulling on his legs (see TheHorse.com/156728 for more on moving stuck horses). “If you feel you can help your horse out of the stuck position, use sticks to push straps beneath the horse; don’t get in too close to his body,” says Hoyns.
Once you’ve extricated a horse from deep mud, check his legs for signs of soft tissue injury. If possible, summon help to trailer your horse home or to a veterinary clinic for evaluation.
Horses often like to wade out into creeks or ponds to drink. If the horse sinks into mud, he might panic and end up leaping further out into the pond, heading toward the opposite bank. In this scenario, “it is likely that the rider gets thrown,” says Hoyns. “So prevention is everything. If you don’t know the safety of the footing in the water, don’t let your horse go in.”
Tack Troubles
Some hazardous situations on the trail are manmade. Take, for instance, a horse that is drinking or allowed to eat along the trail with his head down. He picks up a foot to scratch or move but catches a leg in the reins or lead rope tied around his neck. If you’re on a hillside and he falls, the result could be catastrophic for both horse and rider. And if falling into water, the horse could drown.
Don’t leave your reins, lead rope, or running martingale slack. A critical tool for every rider to have on hand, particularly on your person, is a sharp knife to quickly cut an entangling rein or rope.
Hoyns has also seen horses bite at flies on their flanks or bellies and get their teeth or bit stuck in a stirrup. The horse usually panics, circles, and falls down. English saddle stirrup leathers come off backward so are unlikely to release when the horse pulls them forward. Western saddle stirrups typically don’t release.
Prevention is the best medicine; be vigilant and don’t let your horse get his mouth or limbs caught on his tack.
Rope Burns
Rope burns generally happen when horses are tied improperly to a solid object. Camping overnight might necessitate securing a horse to trees, horse trailers, or other stable objects. There is a trade-off between allowing your horse to reach the ground to eat grass or hay and the possibility that he catches a leg over a rope. Ideally, the end of the rope is several feet off the ground, but this then precludes grazing or lying down.
“Know your horse,” says Hoyns. “Monitor at all times. If you need to tie, then use a quick-release knot with a rope that is able to release. If using a quick-release snap, be sure to put it on the end, away from the horse, so you can safely reach it without being in harm’s way.”
Baling twine is another easy-release tying material, but know that if the twine breaks and your horse gets loose, he might wander away from camp. In theory, horses don’t tend to run off and leave their friends, but such incidents do occur, with reports of horses getting lost in the wilderness.
Colic
Just because you’re out having fun doesn’t mean your horse can’t develop a medical issue such as colic. Ideally, your cell phone works (with a fully charged battery) in an area with cell service, and you can call your vet. If not, Hoyns suggests trying to get your horse out to a road where you can flag a driver down to summon help. Or, if riding with friends, send someone to get help.
“You can’t expect your veterinarian to find you in the woods, so you’ll need to walk out to where help and/or a horse trailer can reach you,” she says.
In the meantime, if your veterinarian has prescribed you an oral sedative, such as detomidine hydrochloride gel (Dormosedan), to keep in your first-aid kit, you can administer a tube to calm your horse until help arrives.
“It is good horsemanship to know how to take your horse’s vital signs,” Hoyns adds. “Work with your vet so you are familiar with how to assess heart rate, respiration, mucous membrane (gum) color, skin turgor (how long it takes for pinched skin on the neck to retract—an indication of hydration), and intestinal sounds. This information is important to relay to your veterinarian once you make contact.”
Tying-Up
Horses occasionally tie up (essentially, suffer muscle cramps), especially if dehydrated and lacking electrolytes during long-distance riding. If your horse shows the typical signs of stiffness, sweating, and a reluctance to move, Hoyns suggests standing with him quietly and waiting the episode out. If your horse still won’t move, find a safe place to tie him, if possible, and summon help.
“It is always prudent to have a good halter and lead line with you for this purpose,” she says. “Don’t tie your horse with reins attached to a bit in his mouth.”
Choke
Choke (esophageal obstruction) is most likely to occur after a ride, when your horse is hungry and bolts his food yet is a little dehydrated and lacks normal saliva volume.
“Use slow feeder haynets with small holes to slow intake,” says Hoyns. “Or, shake out the hay so the horse can’t take big mouthfuls. Restrict dry grain when your horse first gets in front of its food.”
Also, do not forget to offer free-choice water at every opportunity.
Leg and Hoof Issues
Arduous rides over rough terrain or even quick missteps during tamer outings can result in tendon sprains or strains. If your horse comes up limping and there is a cold creek nearby, immerse his legs for 15 to 20 minutes, says Hoyns. Then, lead him out and make your way slowly to the nearest road.
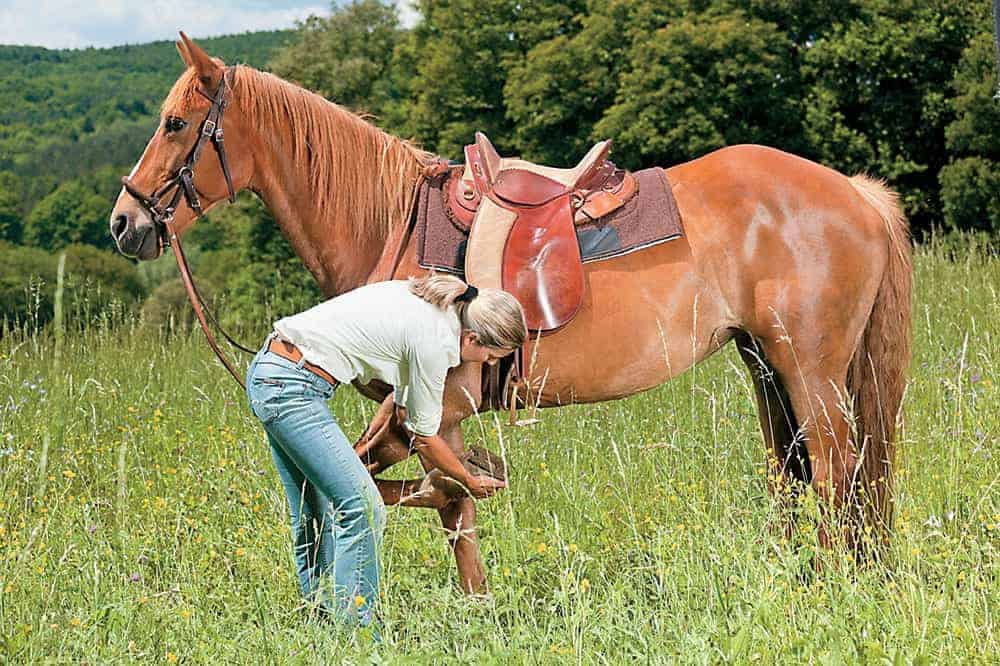
A common trail emergency involves your horse’s shoes. The easiest solution for a lost shoe is to replace it with a hoof boot. Hoyns suggests keeping a properly sized hoof boot in a bag attached to your saddle.
“Prepare the boot in advance so you know it fits and by cutting down the plastic or rubber so it won’t rub on the coronary band,” she says. “Use a boot that is easily modified, so it accommodates your horse and possibly a friend’s horse. Most horses get along fine for a while without back shoes or boots if they lose a horseshoe.”
If your horse hasn’t lost his shoe, but it’s sprung or bent, you can use a multitool to rasp the clinches if they are sticking out, and a hoof pick or a screwdriver to apply leverage to remove the shoe. Work with your farrier at home to learn how to pull a horseshoe properly, without tearing up the hoof wall.
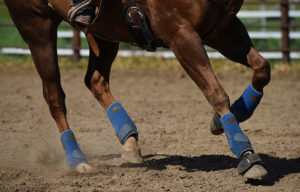
Lameness can happen anytime, anywhere, and it’s not uncommon on the trail. “Get off and check the horseshoes for placement and for rocks, sticks, or burrs embedded in the foot,” says Hoyns. “Check leg boots and the girth for accumulated debris; check tendons for tenderness or swelling.”
If you don’t find an obvious, easily fixed cause for the discomfort—i.e., debris caught in a boot—lead your horse to the nearest road, and call for help.
She says you might not find an immediate reason for the lameness because some injuries, such as bowed tendons, take time to become more apparent. Continuing along the trail could exacerbate a significant injury. “When in doubt, stop your ride and lead your horse out,” says Hoyns.
Snakebites
n general, it’s not common for horses to get bit by snakes out on the trail, but the risk is there, especially if riding in deep grass. Other than paying careful attention in snake territory and giving these critters at least a 10-foot berth, there isn’t much you can do to prevent bites. If the worst does happen, get your horse to veterinary care as quickly as possible.
Take-Home Message
Whether going into the backcountry for a day or a week, you’ll want to take along a robust first-aid kit for both you and your horse. The best mantra to follow is “be prepared.” Think about all the possible situations you might encounter, and stock your kit accordingly. Discuss possible scenarios with your veterinarian, so you have not only the supplies but also the knowledge and skill set to implement appropriate emergency care.